Learning how to make lip balm is not only a fun and creative hobby but also a practical approach to personal skincare. With the growing concern over synthetic ingredients in commercial lip care products, more people are turning to homemade alternatives that ensure natural, safe ingredients touch their skin. This guide is designed to introduce you to the simple joys and benefits of making lip balm at home, offering a step-by-step process that even beginners can follow with ease.
Lip balms are essential, especially during the winter months or in dry climates, as they provide a protective layer on the lip surface to seal in moisture and protect them from external exposures such as cold temperatures and wind. By making your own, you control what goes into the product, tailoring ingredients to suit your specific skin needs and preferences, such as using only organic components or incorporating your favorite scents.
By the end of this article, you’ll have all the information and confidence needed to craft a variety of lip balms, perfect for personal use or as thoughtful, handmade gifts.
What You Need to Know Before Starting
Embarking on your DIY lip balm adventure begins with understanding the key components and safety measures. The foundation of any good lip balm is built on a combination of a wax, an oil, and a butter. These serve as the base that will nourish, moisturize, and provide the texture needed for your balm. The most commonly used waxes are beeswax and carnauba wax, known for their natural origin and stabilizing properties. Oils like coconut, almond, and jojoba are popular for their intensive moisturizing benefits, while butters such as shea and cocoa butter are chosen for their rich, skin-softening effects.
When creating lip balm, it’s essential to source high-quality, pure ingredients to avoid introducing toxins or contaminants to your products. Always choose reputable suppliers and organic ingredients when possible. Safety in preparation is another crucial aspect. Ensure your working area and utensils are clean to prevent any bacterial growth, which is paramount when creating products used on the lips.
Additionally, understanding the properties of each ingredient can help you customize your lip balm to specific needs, such as adding vitamin E for antioxidant properties or using peppermint oil for a refreshing scent and natural plumping effect. This section ensures you are well-prepared and informed about the components and safety guidelines necessary for making effective and safe lip balm at home.
How to Make Lip Balm: Step-by-Step Guide
Step 1: Gathering Ingredients
To start, you will need the following basic ingredients: beeswax, coconut oil, shea butter, and an optional essential oil for fragrance. The choice of these ingredients can vary based on your preferences for texture and health benefits. For instance, beeswax offers a solid base that helps keep the balm in place, while coconut oil provides a rich source of hydration. Shea butter is included for its nourishing properties, offering a creamy texture and natural vitamins.
Step 2: Melting the Base
Using a double boiler, gently melt the beeswax, coconut oil, and shea butter together. It’s important to keep the heat low and consistent to prevent any burning or degradation of the oils. Stirring constantly during this process helps achieve a smooth, even consistency, which is crucial for the final texture of your lip balm.
Step 3: Adding Flavor and Colors
After the base is completely melted and combined, remove it from heat. This is the time to add any essential oils, flavor extracts, or natural colorants to your mixture. Adding these elements while the mixture is not on direct heat helps preserve the integrity and effectiveness of the flavors and colors.
Step 4: Pouring and Setting
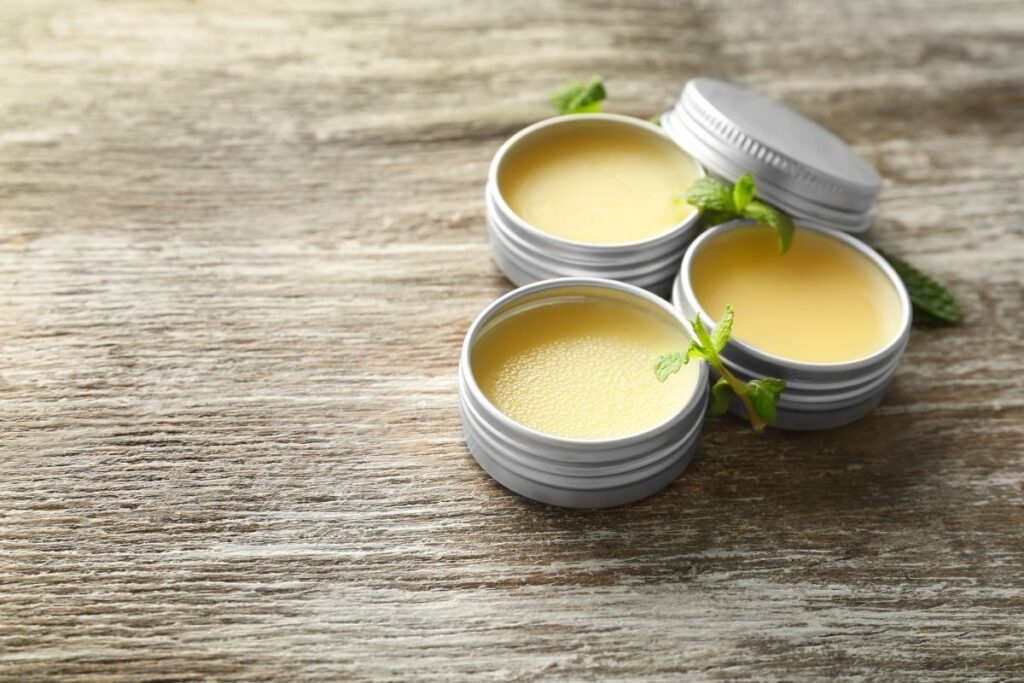
Carefully pour the hot mixture into lip balm tubes or small jars. If using tubes, a pipette or a small funnel can help direct the mixture without spillage. Allow the balms to cool and solidify at room temperature. This can take several hours, but it’s essential for achieving the right firmness.
Step 5: Packaging and Storage
Once your lip balms have set, they can be capped and labeled. Creative packaging can turn these balms into lovely gifts or professional-looking products for those considering starting a small business. Proper storage is key to maintaining the quality of the balm. Keep them in a cool, dry place away from direct sunlight to prevent melting or spoilage.
Customizing Your Lip Balm
One of the best parts of learning how to make lip balm at home is the ability to customize each batch exactly how you want it. Whether you’re aiming for lip balms that help heal cracked lips, offer a tint of color, or simply smell amazing, the options are endless. Let’s explore how you can tweak your recipes to create truly unique and personalized lip care products.
Choosing the Right Oils
The oils you choose can significantly impact the texture and benefits of your homemade lip balm. Coconut oil is a favorite for its hydrating properties, but you might also consider jojoba oil for its longevity and similarity to the skin’s natural oils, or sweet almond oil for its soothing effects. Experimenting with different oils can help you discover what works best for your skin type.
Fun with Flavors and Scents
Essential oils and natural flavor oils can transform your lip balm from plain to exciting. Peppermint oil adds a refreshing tingle that can plump the lips, while vanilla or citrus oils give a delightful scent. Just remember, a little goes a long way! Add a few drops at a time and test the strength before adding more.
Adding Color
For those who like a bit of color, natural micas and even beetroot powder can be used to tint your lip balm. These natural options provide a subtle hue and are safe to use on the lips.
Nutrients and Extras
Adding vitamin E not only acts as a natural preservative but also offers extra nourishment for the lips. You might also consider honey for its natural healing and moisturizing properties, though this will make the balm a bit stickier.
Common Questions and Expert Answers
When you’re starting out on your journey to make lip balm, you probably have plenty of questions. Here are answers to some of the most common queries.
How do I make homemade lip balm?
The process is straightforward: melt a wax base with oils, stir in some butter for creaminess, add flavors or colors, and pour the mixture into containers to set.
What are the ingredients in lip balm?
Typically, a lip balm ingredients includes a wax like beeswax to solidify the product, oils such as coconut or almond for moisture, and butters like shea or cocoa to smooth and protect the lips.
What is the best formula for lip balm?
A good starting formula is one part wax, two parts oil, and one part butter. This ratio provides a solid base, ample moisture, and smooth application.
What ingredients are best for lips?
Ingredients like shea butter, coconut oil, and almond oil are great because they nourish and repair dry lips. Beeswax helps to protect against the elements.
Which oil is best for lip balm?
Coconut oil is popular for its moisturizing properties, but jojoba oil is excellent for its long-lasting benefits and compatibility with skin oils.
What is the healthiest lip balm?
The healthiest lip balm is one that contains all-natural ingredients with no additives or chemicals. Look for balms made with organic oils and butters.
Troubleshooting and Tips
If your homemade lip balm isn’t coming out how you’d like, don’t worry! Here are a few tips to fix common issues:
- Too Hard: If your lip balm is too hard, increase the amount of oils in the mix.
- Too Soft: If it’s too soft, add a little more beeswax until you reach the desired consistency.
- Grainy Texture: Sometimes shea butter can become grainy when it cools too slowly. Try cooling your balms faster in the fridge.
The Impact of Homemade Lip Balms
Choosing to make your own lip balm or how to make lip balm to sell isn’t just about the fun and customization; it’s also a more eco-friendly choice. You can avoid the chemicals found in many store-bought products and reduce plastic packaging. Plus, homemade lip balms can be healthier for you, providing hydration and protection without any unwanted additives.
Why Trust Us
When it comes to DIY beauty products, trust is key, and our guide on how to make lip balm is designed with both transparency and reliability in mind. We meticulously compile information from reputable sources and include proven recipes and methods that have been tested by DIY enthusiasts and experts alike. Our commitment is to provide you with safe, effective, and easy-to-follow instructions that ensure your homemade lip balm is both enjoyable to make and beneficial to use. By focusing on natural ingredients and clear, straightforward steps, we aim to empower you to create products that are truly yours, fostering creativity and confidence in your skincare routines. Trust us to help you turn simple ingredients into extraordinary lip care products that you can feel great about using every day.
Summary
Now that you know how to make lip balm, you can start experimenting with different ingredients and flavors to find the perfect match for your needs. Whether you keep them for yourself or gift them to friends and family, homemade lip balms offer a personal touch that commercial products simply can’t match.


